czwartek, 27 lipca 2017

TUTORIAL - JAK W PROSTY SPOSÓB POPRAWIĆ JAKOŚĆ SWOICH ZDJĘĆ BIŻUTERII


Anna Krawczyk - bluebirdbeads.blogspot.com


CZĘŚĆ 1: stworzenie namiotu bezcieniowego z tego co masz w domu 

MATERIAŁY:
-          karton
-          ostry nóż lub nóż do tapet
-          taśma klejąca
-          biały papier śniadaniowy
-          marker lub długopis

-          biały (lub w innym kolorze) arkusz brystolu A4 / A3 / A2 (w zależności od wielkości namiotu)


1. Wytnij jedną ze ścian kartonu.


2. Na trzech sciankach narysuj prostokąty, zostawiając wystarczający margines  (około 1.5-2cm) żeby konstrukcja była wystarczająco mocna po wycięciu środka. Upewnij się, że arkusze papieru śniadaniowego są wystarczająco duże aby zakryć te prostokąty.


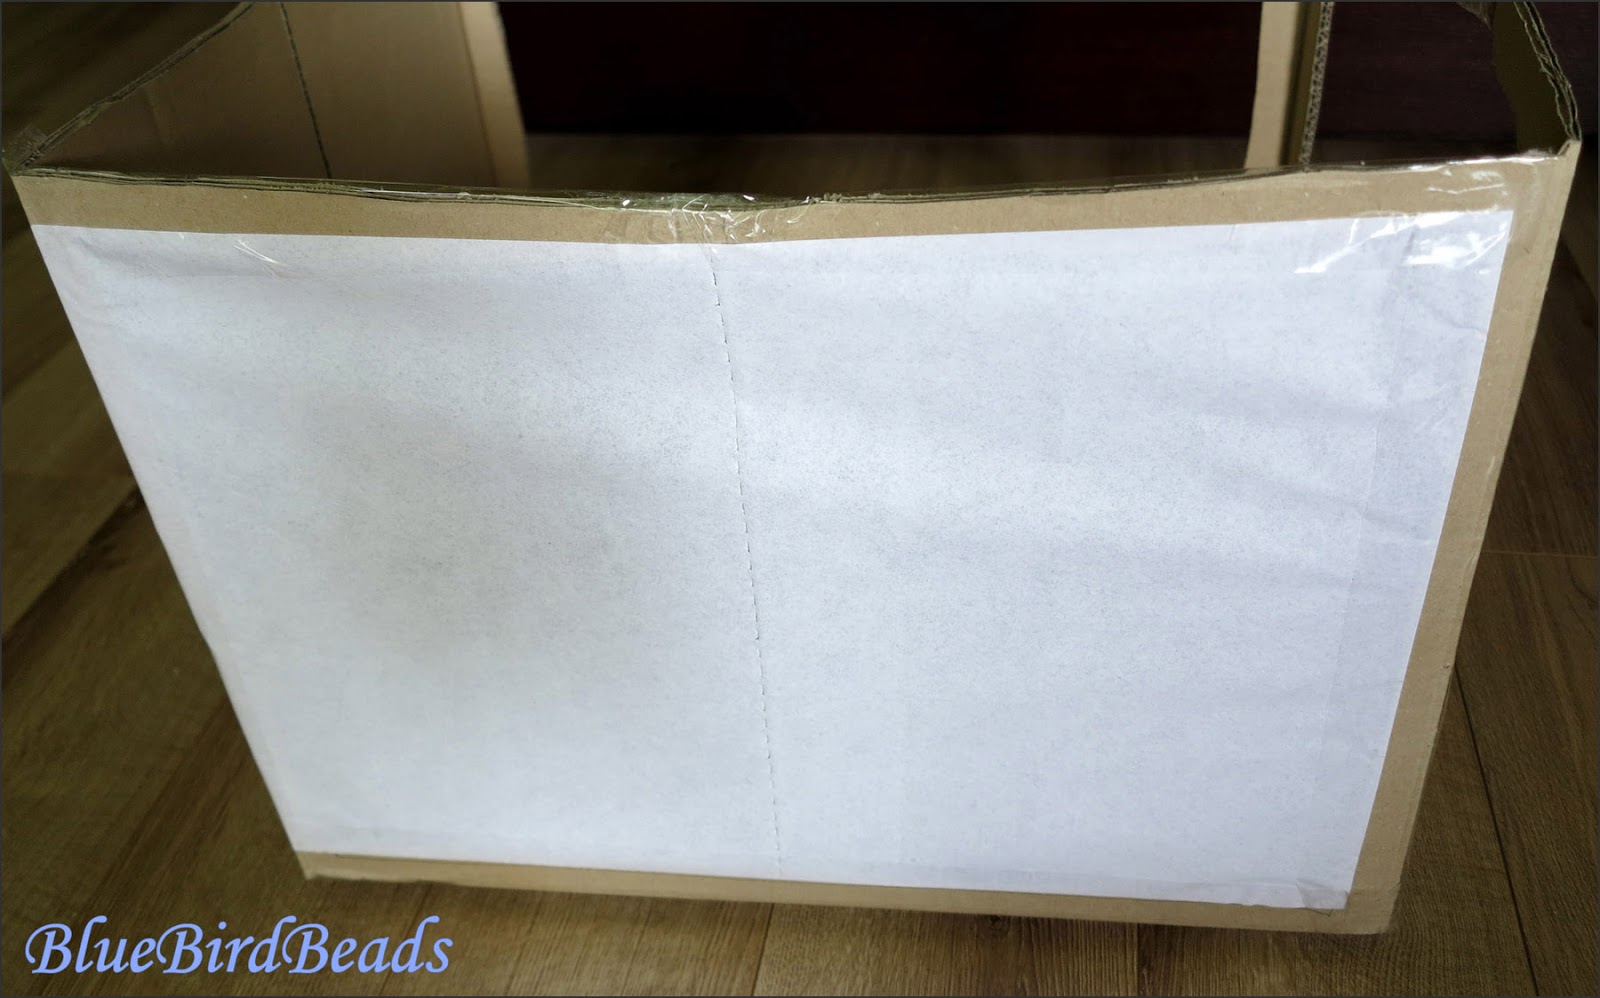
3. Wytnij prostokąty ostrym nożem lub nożem do tapet.


Tak to powinno wyglądać po tym kroku:


4. Na ramy powstałe po wycięciu prostokątów naklej arkusze papieru śniadaniowego. Upewnij się, że jest równy (nie musi być idealnie – byle nie było zmarszczek, które mogłyby powodować cienie).


5. W razie potrzeby możesz wzmocnić części ramy taśmą klejącą lub dodatkowym kawałkiem kartonu.


6. Twój namiot bezcieniowy jest prawie gotów


7. ...dodaj tylko tło w wybranym kolorze.


To naprawdę robi różnicę - przykłady:

Lepsze odwzorowanie kolorów:


Łagodniejszy gradient światła (1), mniejsze i delikatniejsze cienie (2):

(zdjęcia bez obróbki, zrobione w pochmurny dzień bez dodatkowego światła)

Jednostajne rozproszenie światła, więcej refleksów na przedmiocie:


1. zdjęcie na białym papierze bez namiotu bezcieniowego 
2. zdjęcie zrobione w namiocie bezcieniowym 
3. zdjęcie zrobione w namiocie bezcieniowym dodatkowym trickiem*
1                                                           2                                                        3 
(zdjęcia bez obróbki, zrobione w pochmurny dzień bez dodatkowego światła)
trick –  weź dodatkowy kawałek brystolu lub prostokąt, wycięty z kartonu. Owiń go folią aluminiową i używaj do odbijania światła w kierunku Twojego obiektu. Sprawdź różne kąty nachylenia, aby uzyskać różne efekty oświetlenia.


Aby przekonać się o tym jaką różnicę robi namiot bezcieniowy obejrzyj moje zdjęcia z 2015 i 2016 do maja i jak poprawiły się one później.

Mam nadzieję, że podobał Ci się ten tutorial. Czekam na Twój komentarz na:  bluebirdbeads.blogspot.com

Wkrótce następna część tutoriala (podstawowa obróbka zdjęć).


czwartek, 20 lipca 2017

TUTORIAL - HOW TO EASILY IMPROVE YOUR JEWELLERY PICTURES QUALITY


by Anna Krawczyk - bluebirdbeads.blogspot.com


PART 1: making a lightbox from what you have at home

MATERIALS:
-          cardboard box
-          sharp knife or wallpaper trimming knife
-          scotch tape
-          white sandwich paper
-          marker or a ball pen
-          white or other color A4 / A3 / A2 Bristol board (depending on the box size)


1. Cut out one of the walls of the cardboard box.


2. Draw the rectangles on three walls of the box, leaving enough margin (about 1.5-2cm) to keep construction strong enough after you cut out the inside. Make sure the sheets of sandwich paper are big enough to cover those rectangles.


3. Cut out the rectangles with a sharp knife or a wallpaper trimming knife.


That is what you should get after this step:


4. Stick the sandwich paper to the frames using scotch tape. Make sure that it is even (does not have to be perfect – just no wrinkles that could cause the shadows). 


5. You may want to strengthen some parts of the frame with the scotch tape or even additional cardboard if necessary.


6. Your lightbox is almost ready…


7. ...just add the background (the more it covers the back wall of the lightbox the better).


It really makes a difference – examples:

Better image of colors:


Softer gradient of light (1), smaller and softer shadows (2):

(pictures without edition taken on a cloudy day with no additional light)

Even distribution of light, more reflexes:


1. picture on a white paper made outside the lightbox     
2. picture made inside the lightbox        
3. picture made lightbox using small tip*
1                                                           2                                                        3 
(pictures without edition taken on a cloudy day with no additional light)
* tip – take additional sheet of Bristol paper or one of the rectangles that you cut out of the box. Wrap it in the aluminum foil and use it to reflect additional light towards your object. Play a little with various angles to find the best effect.


For more examples on how the lightbox makes a difference check my pictures from 2015 and 2016 until May and how they improved after.

I hope you will find this tutorial helpful. 
Let me know how you did your lightbox at bluebirdbeads.blogspot.com

Stay tuned, as the second part is coming soon (basics of photo edition).